Debugging Your Renderer: Introduction (part 1 of n)
The great pleasure of computer graphics is simple: write program, make picture. Then you write a better program, and you get a better picture. It’s something that doesn’t happen if you work with compilers or operating systems, and while I’m sure those fields have their own pleasures, for me, there’s nothing like a better picture.
Another thing that can happen is that you write a better program, and you get the same picture more quickly. That, too, is a delight, from satisfactions like turning something that stuttered along at a few frames per second into something that runs in real-time. Alternatively, you can trade off “faster” for “better,” as laid out by Jim Blinn’s observation:
As technology advances, rendering time remains constant.
Maybe you’re working on a renderer for a movie and it’s crisis time: there’s not enough time to render the rest of the movie before it’s due. You, rendering hero, optimize the renderer and make it fast enough that rendering will be finished early. Time to breathe a sigh of relief, right?
No, but congratulations anyway: the artists will add more complexity until rendering is once again pushing up on the time left to get the movie finished. Your work has haven’t bought any more breathing room, but you’ve made it possible for the film to be more visually rich, which is even better, even if it isn’t any less stressful.
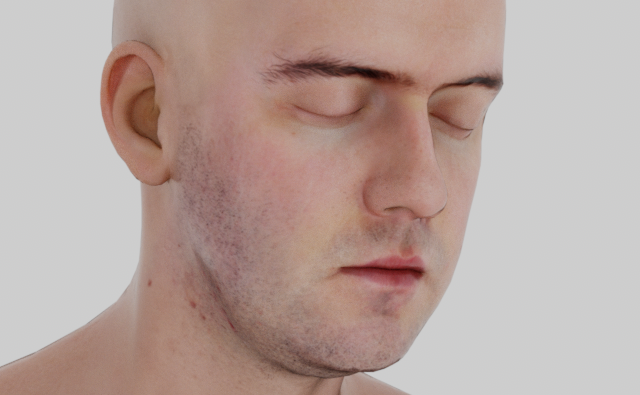
There’s one little thing about that feedback loop, though—sometimes it goes: write program, make bad picture. One moment you’re rendering something like this and feeling good about your cutting-edge subsurface scattering model, having just turned it up to be based on a hendeca-pole:

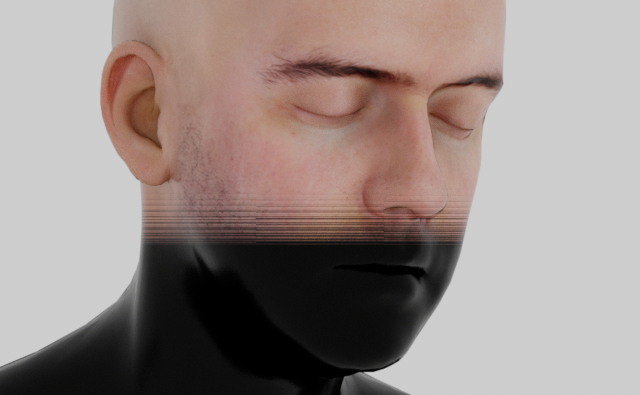
And then you make a few more changes—often things that seem completely innocuous. You re-compile and re-render, and you get something like this, which happens to be what I spent a few hours debugging last Tuesday:

There’s the other thing that comes along with programs that make pictures: bugs manifested visually. It’s both a blessing and a curse—images can offer clues about what’s going on, but the clues are often inscrutable.
That bug turned out to be that a loop over all pixels that needed to sample illumination from the light had an incorrect count of the number of pixels with visible reflective geometry. Once you know that, the image makes some sense. (You can see, for example, that the loop starts with the pixels at the top of the image. The bands in the middle where the good pixels start petering out hint that the renderer is running in parallel.) The trick is to learn how to work backward from images like this one, interpreting those artifacts into theories about what went wrong that can guide you. The better you can do that, the more efficiently you can debug your renderer, and in turn, the more effective you are as a programmer.
I’d like to think that over the years I’ve picked up a few useful tricks in the renderer-debugging department, including approaches for working backwards from buggy images, techniques for drilling down into what’s happening when a renderer goes wrong, and some programming habits that help avoid getting to the point of buggy images in the first place. I’m overdue writing all that up, but better late than never: we’ll dig into these topics in a series of posts over the coming weeks.
Next time: the basics—a few words about unit tests.